How to use Dataddo, the third-party app that offers free connectors for Looker Studio?
Looking for a free connector to retrieve data in Looker Studio? Search no more, we’ve just found the right service for you !
If you’ve been using Data Studio / Looker Studio for long enough, you know that soon or later you’ll have to pay to retrieve certain types of data (Facebook Ads, Shopify, TikTok Ads, …), using a premium connector. But there’s no fatality!
In this article we’re going to show you how to use Dataddo, the third-party app that offers free connectors for Looker Studio. Yep, you’ve read just right, FREE CONNECTORS FOR LOOKER STUDIO!!!
Before we jump in, a couple of things to avoid misunderstanding:
This is not a sponsored article, we’re no Dataddo affiliates (but if Dataddo people are reading this and want to subsidize us, go ahead!). We’re sharing this because we extensively use their tool for our personal projects
The glitch (you knew it was coming): you can only connect 3 different data sources and get data updated once a week. Not ideal but still, it does the job for many use cases, from testing to monthly reports. If you want more data sources and/or more frequent data refreshes, you’ll have to switch to a paid plan, which aren’t that expensive either
So, with no further delay, please read below if you want to learn how to use Dataddo and give the tool a try!
Top Looker Studio connectors we love and use on a daily basis (all with free trials): PMA - Windsor - Supermetrics - Catchr - Funnel - Dataslayer. Reviews here and there.
Not sure which one to pick? Have a question? Need a pro to get a project done? Contact us on LinkedIn or by e-mail, and we’ll clear up any doubt you might have.
Looking for Looker Studio courses? We don’t have any… but you can check Udemy!
How Dataddo works: source, destination, flow
First, please proceed to Dataddo and open an account (you can do so using an e-mail address or your Google account). No worries, totally free.
Once open, we’ll let you decipher the home page and the different paid plans (very standard website in all fairness ^^), to focus on the header top left of the page, this is where the magic happens:
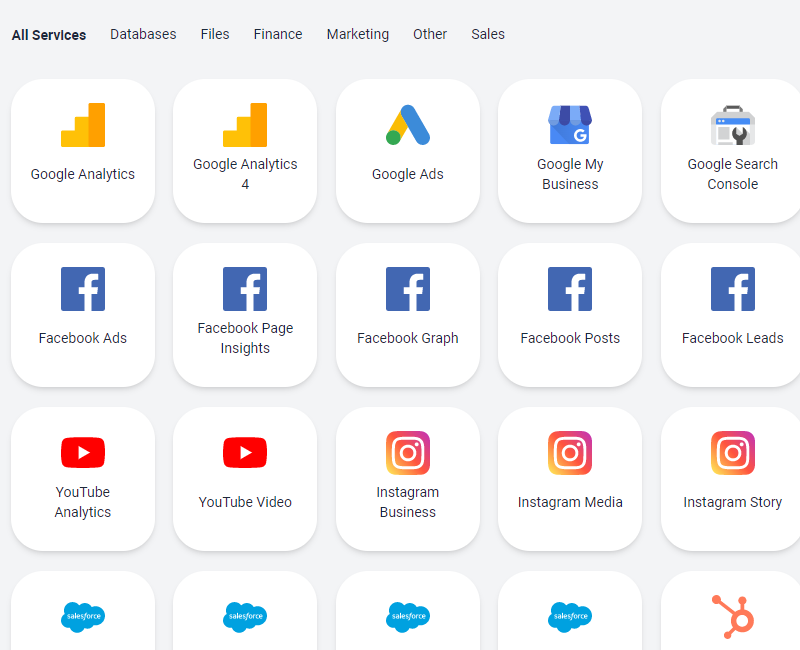
Sources: Here you just have to pick the services you want to connect to. Dataddo offers a wide range of connectors, from databases to Ads (Meta, Tiktok, LinkedIn, …), CMS (Shopify, WooCommerce, …), CRM (MailChimp, Klaviyo, …), and even a Universal JSON, super useful to anyone who doesn’t know how to retrieve online data using Python
Destinations: In our article, we’ll focus on sending the data to Looker Studio, but actually you could send it to other places such as a Google Sheet, databases such as BigQuery, other dataviz tools such as PowerBI, …
Flows: This is where you link a Source to a Destination. Think about it this way: you could send data from source Facebook Ads to destination Looker Studio, this is one flow; or send data from source Klaviyo to destination BigQuery for instance, this is another flow…
With this in mind, let’s create our first combination of source + flow, the destination being Looker Studio obviously !!
Our first connector with Dataddo
For this example, I’m going to use Klaviyo, but feel free to use any service listed. Please click on Source at the top of the page, then Create Source, and pick the service you want to connect to (don’t forget to give your source a name top of your screen).
Dataddo will ask you to enter your credentials and give it access to the service, just follow the steps, quite easy.
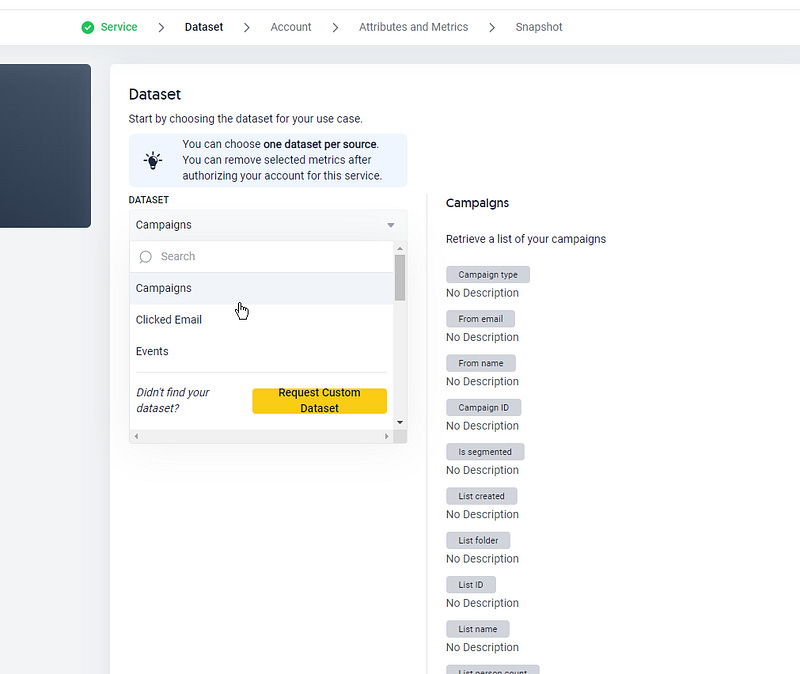
Now, you need to select the view you want to have a look at. Dataddo has an already defined set of datasets for each service, which depends on the type of API that is provided.
In my case, I’ll choose Campaigns from Klaviyo. On the right side of the screen, Dataddo shows me all the dimensions and metrics I’ll have access to:
Here, Dataddo may ask you again which account you want to use (depends if you already gave access or not), and on the Next page you can pick which dimensions and metrics you want to see (there is no need to retrieve everything if you don’t use everything…).
Now, for the snapshot, pick Weekly (Daily is for paid plans) and select the day/hour when you want your data to be refreshed under Advanced.
You may want to Test Data top of the screen to check what’s your getting (have a glance of the data at hand + number of rows available), and you can now Save your source.
Congratulations, you’ve created your first source! A pop-up should be there to kindly ask you to create your first flow, click on it.
Give your flow a name top of the screen. Source is already selected, now you can pick a destination on the right side of your screen, choose Looker Studio, and then Create Flow.
That’s it, we’re almost there! Copy the Dataddo API Key that is shown on your screen, and let’s move now to Looker Studio.
Creating a Dataddo source and building your first dataviz in Looker Studio
Now that’s the easy part (the previous part was easy as well in reality!).
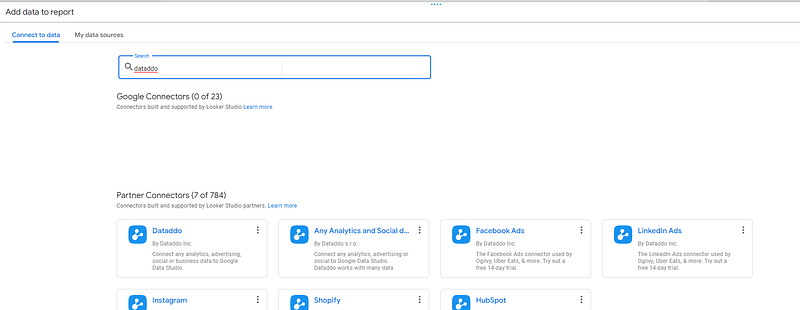
In Looker Studio, create a new report, create a new data source, search for Dataddo, pick the one named Dataddo connector, grant access if asked for, enter the API key, select your flow, and that’s it.
All your third-party service data in Looker Studio, for free (you’re very welcome), now it’s time to play!
In this article, we’ve reviewed how to use Dataddo, the third-party app that offers free connectors for in Looker Studio.
PROBLEM SOLVED !
Top Looker Studio connectors we love and use on a daily basis (all with free trials): PMA - Windsor - Supermetrics - Catchr - Funnel - Dataslayer. Reviews here and there.
Not sure which one to pick? Have a question? Need a pro to get a project done? Contact us on LinkedIn or by e-mail, and we’ll clear up any doubt you might have.
Looking for Looker Studio courses? We don’t have any… but you can check Udemy!
Communicate and browse privately. Check Proton Mail and Proton VPN
Website hosted by Tropical Server


