How to make the best use of publishing and versioning in Looker Studio?
Want to prevent your Viewers to see live changes you’re making? Enable manual publishing, and learn how to revert to previous versions
By default, every single modification you’re doing when editing a report in Looker Studio / Data Studio is shown real time to viewers, which is far from being ideal when you need to test out stuff before release. In this short article, we’ll show you how to make the best use of publishing and versioning in Looker Studio, so you don’t have to worry about what your users see anymore.
Top Looker Studio connectors we love and use on a daily basis (all with free trials): PMA - Windsor - Supermetrics - Catchr - Funnel - Dataslayer. Reviews here and there.
Not sure which one to pick? Have a question? Need a pro to get a project done? Contact us on LinkedIn or by e-mail, and we’ll clear up any doubt you might have.
Looking for Looker Studio courses? We don’t have any… but you can check Udemy!
How to turn manual publishing on
Maybe you want/need to make changes to an existing reports already used widely in your corporation, but you don’t want to impact users experience.
Well, the best way of doing so is to use the Manual publishing feature offered by Looker Studio. Basically, it creates 2 versions of the report:
The published one, which is the version seen by Viewers
And the draft, that can only be seen by Editors when they are in Edit mode (please note that all Editors work on the same draft)
This way, your users can still access the report whilst you break and rebuild everything. And when ready, just publish the draft so it replaces the published version, as easy as that!
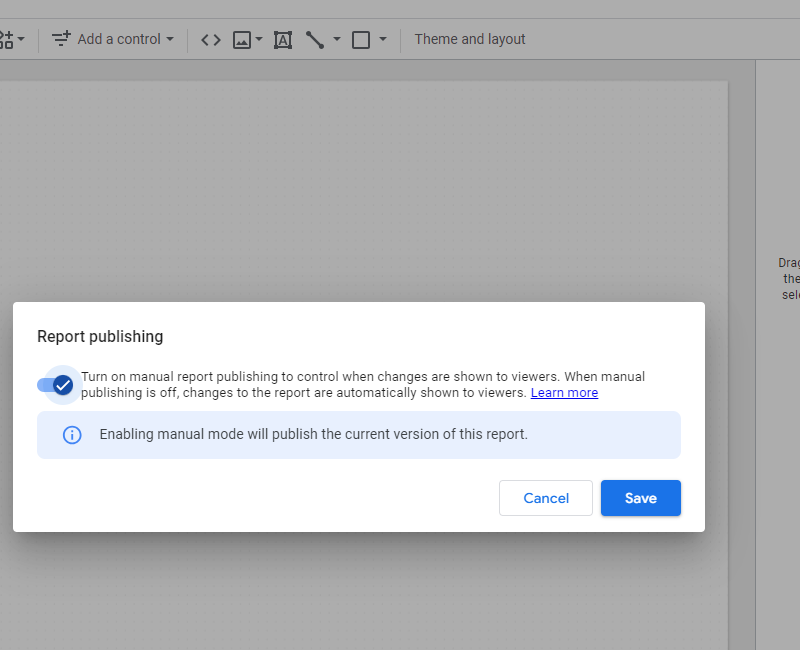
So, how to do this? Under File, Publishing settings, just tick the Turn on manual publishing button, Save, and you’re good to go!
You’ll now see a Publish button at the top of your screen in Edit mode. When ready, hit this button: the draft version you see when editing will become the published version, seen by Viewers. Straight-forward right?!
Quick note on the versioning, or the importance of naming your versions
A report is rarely a finished product, it keeps being edited as needs from the business changes and/or more data become available.
But what if you made a change, but need to revert it for x y z reason?
Well, the best way of preventing the chaos to develop is to name the different versions you build, so you can come back at any point in time to previous versions.
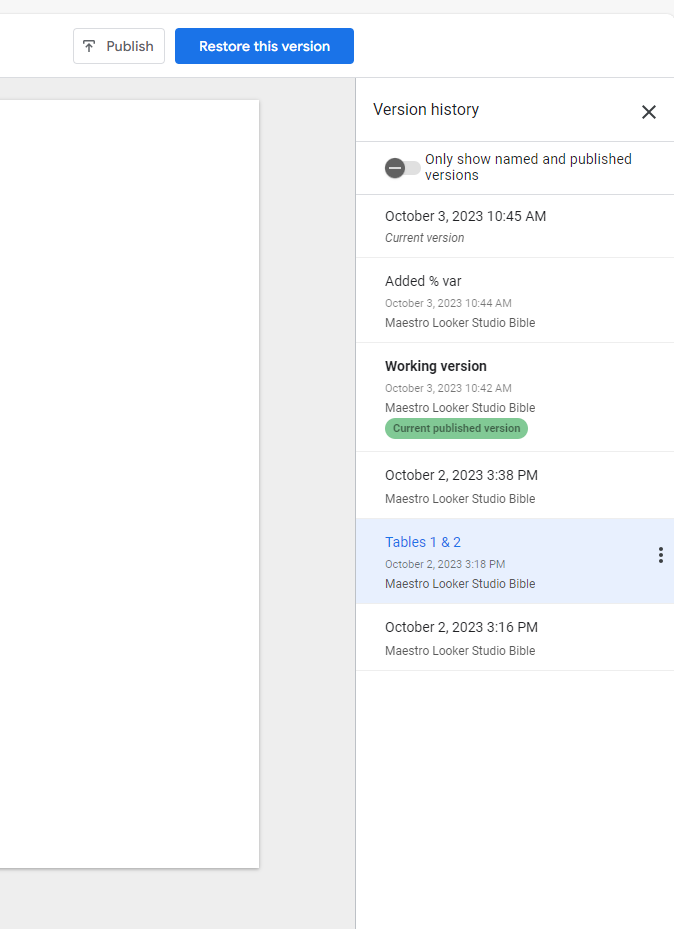
Once reaching a stable version, under File, Version History, click See Version History. You can now name the different versions. No need to name them all, only the main ones, so when you need to come back to them, just tick the Only show named and published versions, and you’ll be able to revert to any of these by hitting the Restore this version button at the top of the screen.
In this short article, we’ve reviewed how to make the best use of publishing and versioning in Looker Studio. Think about this BEFORE the chaos arises!
PROBLEM SOLVED !
Top Looker Studio connectors we love and use on a daily basis (all with free trials): PMA - Windsor - Supermetrics - Catchr - Funnel - Dataslayer. Reviews here and there.
Not sure which one to pick? Have a question? Need a pro to get a project done? Contact us on LinkedIn or by e-mail, and we’ll clear up any doubt you might have.
Looking for Looker Studio courses? We don’t have any… but you can check Udemy!
Communicate and browse privately. Check Proton Mail and Proton VPN
Website hosted by Tropical Server


